


Hi there paper crafting peeps! I wanted to share something I've been experimenting with these last few days. CHIPBOARD is back and it's hotter than ever! This is a really good thing since I have a TON of it left over from 6-7 years ago when it came out the first time;) Papercrafting supplies are a lot like fashion in that trends come and go. Usually when an old trend comes back, there is a new spin on it, like leggings and tunics are back in right now, right? But have you noticed that the tunics are sleeker and more shaped? I bought one the other day and it has a nice shape to it, a waist in it, versus the super boxy or even trapeze tunics of the late 80s/early 90s. Such is the new chipboard trend, the NEW cool way to use chipboard is by texturizing it. Melody Ross has some awesome new tools for adding texture and life to your chipboard. I purchased these cool shaped chipboard pieces as well as the handles and two sets of texturizing heads (Birds and Iron Works) from her line by gcd Studio. The way to use the tools is by first WETTING the chipboard piece with a spray bottle. This is important and I didn't know this at first, I DID manage to get impressions into the chipboard without wetting it, but whoa, it's tough! Definitely worth it to wet it first, it makes it much softer and easier to take the impression.
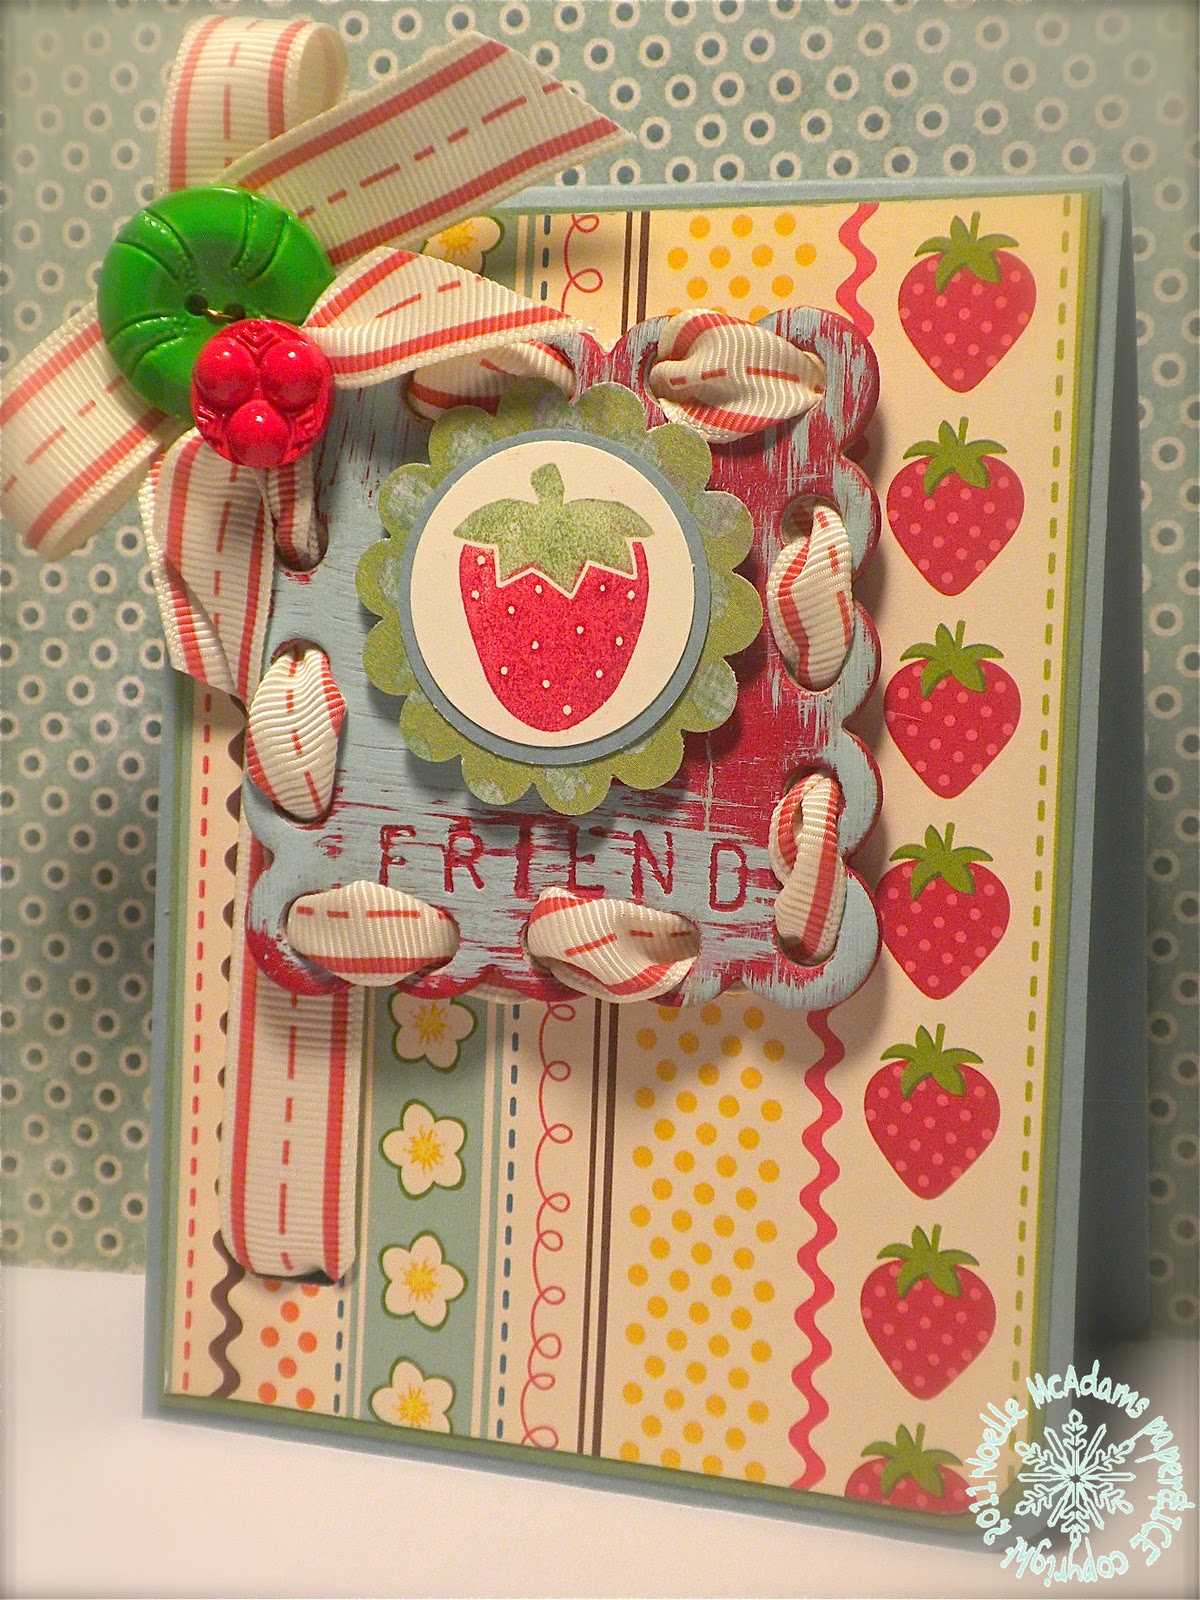
 My card at the top is actually not done with the Melody Ross impression tools. I had an old metal letterpress set (ALSO from "back in the day") it's about as old as my chipboard! The set is almost like an old-school metal punch set, what you do is take each letter (each one is it's own metal piece, about 2-3" tall) and hammer it onto where you want the impression. I used to use it for metal tags and suede accents, but seeing the new chipboard tools gave me the idea to use it this way! I then coated the piece with red acrylic paint and then once it was dry used a very dry brush with robin's egg blue acrylic paint for an aged look. I did punch 2 holes on the left hand side of my card and threaded ribbon all the way through. The chipboard piece was cool and had a lacy sort of scalloped edge with a hole through every scallop. I took my ribbon and threaded it through all the holes. Some of my fave Melody Ross buttons, a bow, and some punched stamped images complete the vintage look.
On the accent in the middle I did the same thing as the one on the card, except I used 4-5 layers of paint and some Log Cabin Smooch Spritz. The bottom accent was only done with Glimmer Mist, and the impression tool. The Glimmer Mist actually wet the chipboard enough so I didn't need water. I am not sure where I will use these cool accents yet.... but I'm sure something will come up sooner or later! ;)
Well, that's it for me today, I'll be back tomorrow with the new colors and some scrapbook pages for colourQ! Have a great evening:)
-Noelle
supply lists:
card: solid cardstock in Ivory and Baja Breeze, markers, and strawberry stamp:SU!; chipboard and buttons: Melody Ross; ribbon: Michaels; strawberry patterned paper: October Afternoon; green patterned paper: MME; punches: EK Success; letterpress set
1st accent: Chipboard and impression set: Melody Ross; paint in gold, robin's egg blue and leaf green: Folk Art; Log Cabin Smooch Spritz
2nd accent: Chipboard and impression set: Melody Ross; Glimmer mist in Angel's Wing
DUST IT OFF!: Chipboard and letterpress set
No comments:
Post a Comment