Home Design Work Recognitions For Sale About Me

Monday, November 7, 2011

Joyful Deer (Jingle Belles, Paper Players)

Hi there! Hope your weekend was great! :) I had an extra hour of sleep Saturday night, so that made me a very happy girl. :) I decided to get my craft on Sunday afternoon & got my pages done for colourQ (you'll get to see them tomorrow!) and finally a challenge card done? Yep, it's true :) I am for the first time ever playing over at The Paper Players, and also at one of my **fave** challenges Jingle Belles with this card. I also got to use some fun, NEW goodies on it! Check it....


Now, sweet Anne Marie is the host at Paper Players for this challenge. Anne Marie is a follower of **this** humble little blog, and I have to admit, I am very flattered she is a follower, because I love her work! :)

Here's the "recipe card" for this week's challenge at PP. Cool huh? Now the challenge at Jingle Belles is a challenge to use something CLEAR, so my patterned acetate card front is (and this being a Christmas card!) are the qualifying factors over there. It seemed like the 2 challenges would mesh well. I have to admit, I'm really not a big fan of when people play 17 challenges with one card. I hope I'm not offending anyone by saying that, but it seems that often the card doesn't "fit" ALL the challenges it's linked to, in that case. I'm a one, or like today, maximum of 2 challenges per project kind of girl. I'll only mix challenges if I feel I can blend them without "watering down" one of the challenges.

I was at a crafts show with my Mom this weekend! Super fun, I love craft shows! Though I don't mind telling you, this one was CRAZY packed, I have rarely seen those kinds of crowds, whoa! At the craft show, there was a booth for The Greeting Farm stamps! One of the "characters" of their stamps is Ian. Well, my son is named Ian, so I had often thought of picking up a couple "Ians" for my stamp collection! But I never had, until this weekend! I got Hello Ian and the stamp you see here is from Forest Friends. Don't be surprised if you see more of these cute stamps join my collection, either! Especially since they gave me a coupon at the craft show. ;) And I had no idea this company is really close to home for me, they are located in Parker, CO! Isn't this little deer precious? :)


Ok, well for layout, I was stumped, I had to include 3 patterned papers, two ribbons, a punch (I actually used 2 punches!), acetate, glitter, and I wanted to use my new stamps, WHEW! However was I going to fit all that on one little card? Well, I found this OLD Mojo sketch that looked like it would work, I didn't follow it EXACTLY, but this was my jumping-off point.

I started out by making my card base. I cut a 2 sided patterned paper to 4 1/4" by 12", and my acetate to 4 1/4" by 6." I used the same border punch on the end of both pieces. Then I trimmed the acetate so the total length was 5 1/2." I scored my DP right below the punched area and measured 5 1/2" from the scored line & cut. Added a little adhesive to the top of the acetate piece and I slipped that underneath the scored flap that now was coming down the front to create that front flap you see on the card.


I then moved on to my dear little deer. I stamped her on white cardstock and colored her with Copics. When I was done with my shading, I used my colorless blender pen to dot some ink along her back and the top of her head, I was trying to make white dots like deer often have along the top of them. It gave a cool look, but not as white as I wanted, so I added a few more white dots with a chalk marker. I fussy cut her out and adhered her to a patterned paper panel. I gave her a jingle bell brad for a collar, because I wanted her to look like a baby Santa's reindeer.


For that blue panel with the sentiment, I cut an Island Indigo scrap to size. I stamped some little snowflakes on it using VersaMark ink, and then I stamped the "joy" sentiment over that using the black Memento ink again. I added a rhinestone flower sticker to the "o" in "joy." After all that was adhered, I adhered a brown grosgrain ribbon around the bottom of the card, and then a light blue thinner ribbon on top of the brown one. The final touch was a very glittery snowflake 3D sticker backed with a punched piece and popped up with a foam dot.

So, I think I got all the recipe pieces, though if you count the patterned acetate, the punched piece behind the snowflake, the piece the deer is on, and the front and back pieces of my card base, I think I have **five** DPs? Hope that is not TOO many! I do think this card ended up a wee bit busier than I would have liked, but I'm leaving it as-is. You know how much I like patterned paper! I also used 2 punches, and I hope the glitter on the snowflake qualifies as a sprinkle since it's not loose glitter.


I hope you like it! Have a fabulous day & I will see you back here tomorrow morning with another colourQ challenge! :)

hugs, Noelle


supply list: stamps: The Greeting Farm & Inkadinkado; DPs: Little Yellow Bicycle; markers: Copic; punches: EK Success; snowflake sticker: Jolee's Parcel; ribbon: The Ribbon Boutique (Hobby Lobby) & Stampin' Up!; snowflake acetate: Hambly Screen prints; solid cardstock in Soft Suede & Island Indigo: SU!; ink: Memento Black and VersaMark

DUST IT OFF!: Uh, that snowflake sticker is from last year, but that's about it... my scrapbook pages for tomorrow have some more fun, older product on them, though! :)

Wednesday, November 2, 2011

It's Beginning to Look a lot like Christmas! (MFTWSC44)

Hi there, friends! Hope you are all doing well, today. :) We woke up to this scene this morning, which resulted in a SNOW DAY for the boys! They have been having so much fun playing outside in the snow, putting up our few Thanksgiving decorations, and I think later on we will bake a little something! :)

While they were occupied outside, I started on this card that had been swirling around in my brain for awhile.... Last weekend, I didn't have my class at church, but the boys did have Sunday School, so, while I had an hour to burn, I went to Barnes & Noble for a soy latte and a look around, I happened upon these **fabulous** vintage look Christmas tags, at 20% off! :)

Here's what the tags look like, so pretty, all glittery and vintagey....

So, I had been thinking on this, even looked around at sketches, but nothing was floating my boat... then today, it's all wintery here, and I spied this new sketch at My Favorite Things! Oh, so perfect for these new tags! :)
I ended up making a 5" square card, but in retrospect would have preferred a 6"instead. I needed a bit more "square footage" than I ended up with! Here's my card:

Everything was going along swimmingly, and I was thinking I'd have room for a sentiment stamp in the lower LH corner of the card. I was also under the mistaken impression at the time, that this was a Mojo sketch, and so I would need a Verve stamp. Uh, wake up, Noelle! MFT! Then I started to panic a wee bit because the only MFT Christmas set I have is the one I used to make this card last year (no longer available). So, what's a girl to do? You want to include some product from the challenge site, but are out of room and don't have the right stamps? Well, here's what I did, I inked up the word "Christmas!"on one of the sentiment stamps & then I stamped it on a teeny tag, I attached it to the vintage tag with a pearl brad, which actually helped hide the hole in the big tag anyway, and I managed to squeeze in a little MFT, anyway! :)
The DPs I used are new (and the tag), but everything else on this card is from last year or older. In fact, that mini tag is really old! 

Well, I hope you like my card! Enjoy your day, whether it be snowy like mine, or a bit on the warmer side! :)

Have a stellar day! 
hugs, Noelle

supply list: decorative tag: Cavallini and Co.; mini tag: Stampin' Up!; stamp: MFT; Patterned papers: Authentique; embossing folder: Cuttlebug; oval cutter: Creative Memories; glitter photo corner and decorative tape: Martha Stewart Crafts; border sticker: K&Company; pearl brad: The Paper Studio; glitzy snowflake brad: Karen Foster; solid cardstock in Real Red & Garden Green, dye inkpad in Real Red: SU!

DUST IT OFF!: Lots of oldies but goodies on this card, including that mini tag, which is probably close to 10 years old! :)

Tuesday, November 1, 2011

Gratitude (CQC109)

Hi all! I am in **LOVE** with these gorgeous rich tones for colourQ this week! Don't you love them, too? Here is my card, which I had so MUCH FUN making! :) I really felt like my Mojo came to visit for this card!! :)


Here's the fabulously RICH palette for this week:


I love this Island Indigo shade and haven't used it much... The layout of the card came from last week's sketch at The Paper Players. I'm **embarrassed** to admit that I didn't follow that blog before.... and then there were some FABULOUS cards in the colourQ Gallery last week, all that used this awesome sketch. Check it!:
So, that was the jumping off point for this card. I loved that banner trailing down the side, so I had to make one :) 

I started off with the dry-embossed background in the houndstooth pattern. I used the Cherry Cobbler red for that main panel, and then I brayered and sponged the Soft Suede ink over the top. I matted that piece with a Soft Suede mat, and mounted both pieces onto a Island Indigo card base. For that strip with the sentiment, I heat embossed that "gratitude" stamp in white EP on an Island Indigo strip, and matted in with a Pumpkin Pie strip. Both pieces were distressed with one of those razor distresser thingys. 

Then I started on my banner. I cut a white strip to size, and then stamped it in the challenge colors with these stamps, which I often go-to for background stamping like this. When I was going through the box that holds my dies and embossing folders, looking for the houndstooth folder, I had spied this tree die which I hadn't used in ages and is just so very cute! :) So I decided I would layer the tree on top of the banner, and use buttons for the "leaves." 


I pulled buttons from all different containers and jars looking for just the right combo of colors and sizes/shapes. I didn't have any buttons in the Island Indigo color, so I used some clear buttons I have that have coordinating punches so you can back the buttons with paper or cardstock. I used glue dots to stick down my buttons after playing with the arrangement of them a bit. The final touch was two clear heart-shaped buttons under the sentiment that I stitched into place with orange baker's twine. Believe me, it was no easy feat stitching through 5 layers of cardstock! Even though I pierced the holes first, there's just no making 5 layers of cardstock and glue dots an easy match for a needle and twine! LOL! 

Well, that is all for me today! I hope you will come play these luscious colors over at colourQ this week! I'd love to see what you come up with! :)

hugs! Noelle


supply list: stamps: Inkadinkado & Autumn Leaves; embossing folder: Cuttlebug; tree die: My Favorite Things; buttons: Papertrey Ink, Stampin' Up!, reclaimed buttons; mini punches to cover buttons in paper: Stampin' Up!/EK Success; white embossing powder and heat gun; VersaMark inkpad; solid cardstock and ink in challenge colors: Stampin' Up! orange bakers twine: Jillibean Soup; square punch (for "tail" of banner): EK Success; edge distresser

DUST IT OFF!: That gratitude stamp is really REALLY old! From the same old set I pulled these stamps for the Halloween treat bags from last week! :)

Monday, October 31, 2011

Happy Halloween 2011!

Happy Halloween! Such a fun holiday, I always LOVE it!! :) Here's a little crafty goodie I gave to the boys this morning (because, you know, just what they need, MORE candy! haha!) I had actually seen these darling test tubes on Niki Estes' blog, too cute! So, I ended up ordering several different sizes of test tubes from PTI, so I could experiment with them! These large squared off ones fit those cute mellowcreme pumpkins perfectly, and those are my kids' faves. :) I used the Halloween set I bought from SU! last year and some DP scraps to make the tags. Also, I used some funny spooky eyes stickers on the top of the tubes. Here's a few more pics:


Having a bit of trouble arranging the text on this post, so I'll put my supply list and sign-off here. Have a spectacularly SPOOKY Halloween! :) -Noelle

supply list: test tubes: Papertrey Ink; stamps: Stampin' Up!; bakers twine: Jillibean Soup; eye stickers: Jolee's; markers: Copic; white eyelets; punches: EK Success

DUST IT OFF!: The patterned papers are scraps from my bin, and the stamps are last year's cuties, LOVE these! :)

Now here's some more cute costume and pumpkin pics of the boys! :)

Ev's costume is Leo from the Little Einsteins,
I made him this card last year and never gave it to him,
so he got it this morning! 
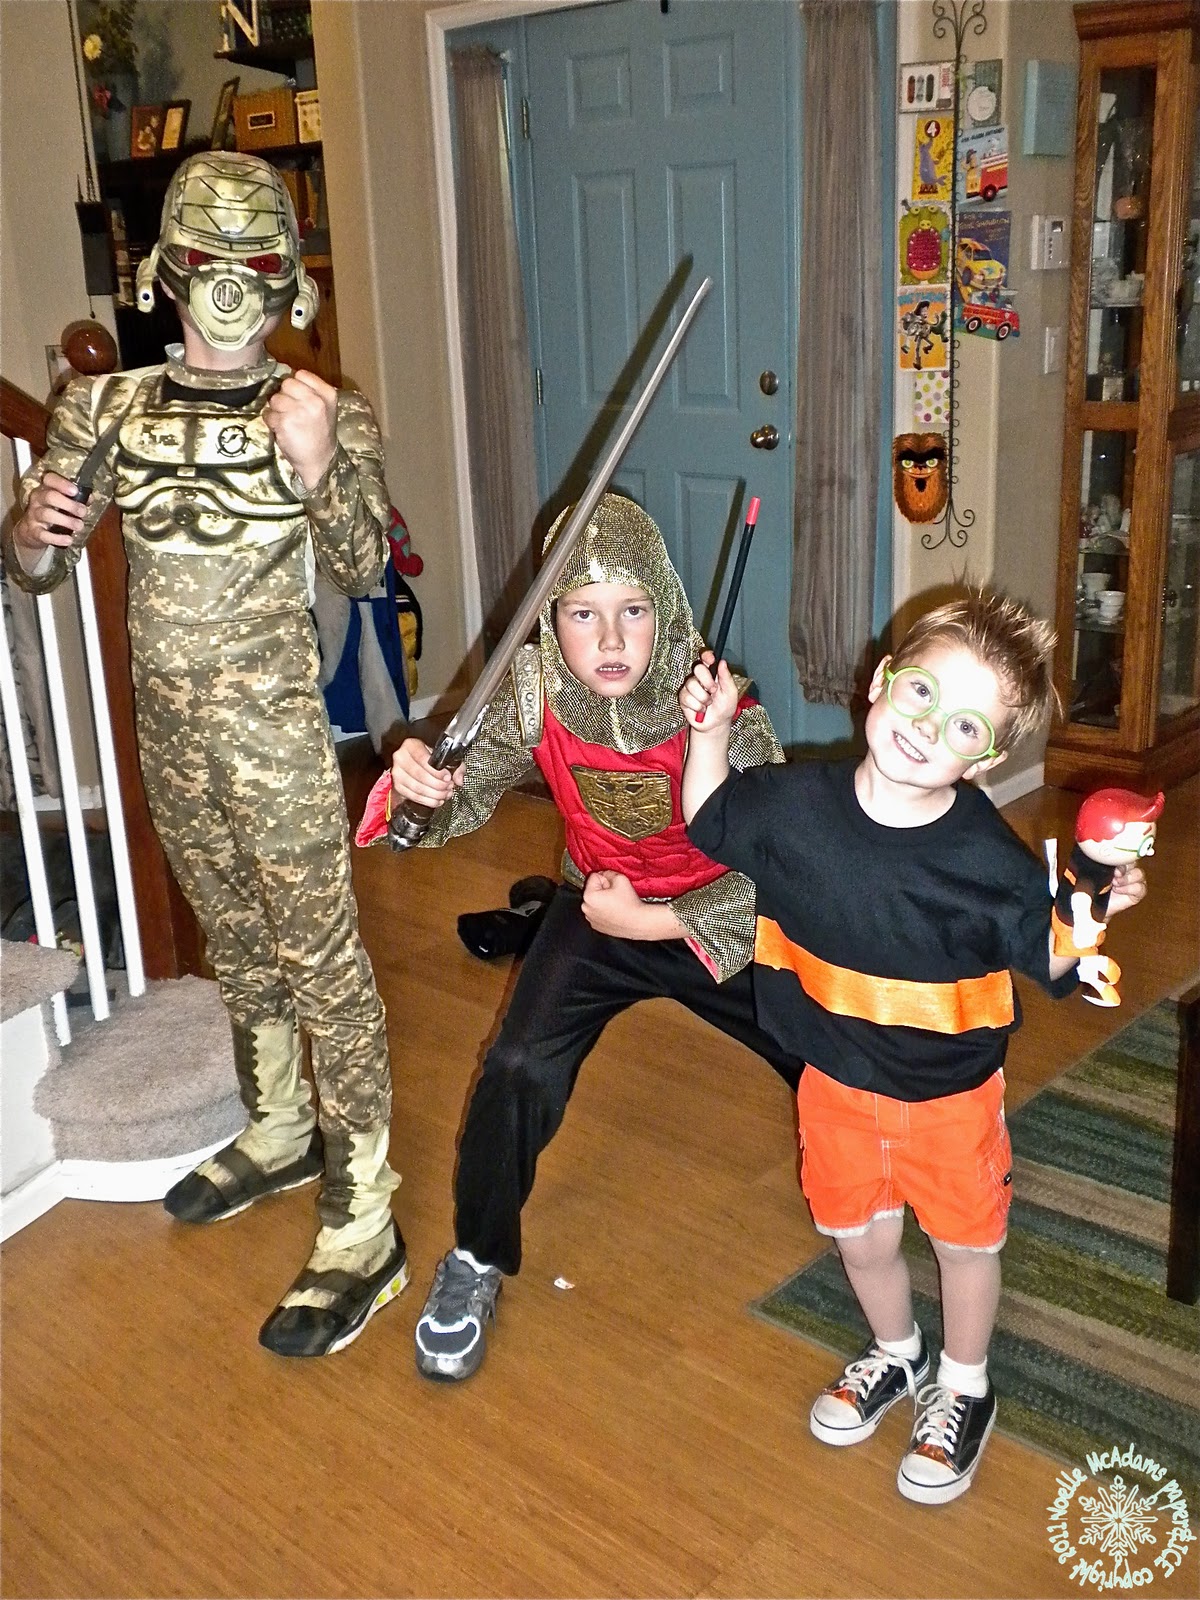
Collin is a knight. He got this card that I made recently.
Ian is a military guy.
He got one of these cards,
I used this card as a design for a Stamp Club project last Fall.
Boys with their jack-o-lanterns! :)


Sunday, October 30, 2011

Wii Birthday Party invitations & kid thank you notes

Hi there! I've been as busy as a bee in my little office these last couple days. My boys' birthdays all fall in a 7 week period, so, particularly years like this one where they all want their own parties, autumn is the season of birthdays around here! These are the invitations for our last birthday party this year! Whew! Collin wanted a "Wii" themed party. I was unable to find Wii themed plates, etc, so I went with Wii Mario Kart. I think I'll make cupcake pics with this stamp, too. It's PERFECT for him, called Game On over at Papertrey Ink. So, I actually made the sample card of these first, and then made the Critter Christmas Cards the other day with essentially the same layout. These papers are actually sports themed, but not overtly so, and I loved the colors and the patterns, I knew Collin would, too! I thought the banner printed DP looked VERY "birthday!" Now just gotta get these guys in the mail, here's the inside for ya.....

Kept them simple and printed in color because my black ink cartridge is empty! Hahaha, sometimes it's NOT a design choice, but a practicality issue instead! ;)

Next up, I hadn't finished the Thank You notes for Ian's birthday party a couple weeks back, you may remember his birthday card and his skater birthday party invitations. I needed some simple, FAST, cute, boyish thank you notes that utilized supplies I already had. Here's what I came up with:

I thought this paper from my stash had a "grungy" feel that kind of went along with the skater theme in a subtle way. I let the DP do the "heavy lifting" on these cards. I used those Dude stamps from Verve again for these, along with an old SU! hostess set for the "rock star" stamp. Now all I gotta do is get my kid to actually WRITE his thank you notes! Wish me luck! ;)

Well, that is it for me today, I'll be back tomorrow to show you a sweet Halloween treat! See you then!

xoxo, Noelle

supply list: patterned papers: Bella Blvd. & Fancy Pants Designs; stamps: Verve, Stampin' Up!, Cat's Pajamas, and Papertrey Ink; punches: EK Success; black buttons: BasicGrey; dye inkpads & solid cardstock: Stampin' Up!

DUST IT OFF!: That paper on the thank you notes is really REALLY old, I just never had the "right" project for it, I think this one fit the bill! :) 

Saturday, October 29, 2011

Halloween Fun!

Well, hello there! Happy "Halloween Eve!" Hope you all are doing well, we've been up to the usual pre-Halloween activities... Halloween parties, pumpkin carving, and a few crafty things as well. These are the pics of the boys before the Halloween Party at church the other night. Collin is a knight, Ian is a "Combat Commando" (essentially a soldier in camouflage..), Evan is Leo from "Little Einsteins. I think Ev's costume is one of my favorite the boys have ever had. Right up there with this one (LITTLE) Collin wore in 2005...
Do you recognize him? He's the Lollipop Munchkin from "The Wizard of Oz!" :) Look at how little he was!! :( He was just about to turn 3 in this pic **sob** 
Anyway, my 2 FAVE costumes the boys have ever worn, right there! Here's another pic from the other night, an action shot! So, I'm not just going to go on and on about how cute I think my boys are.... I actually DO have a crafty project to show you, too! :) Every year we have loads of "regular" trick-or-treaters, and then we have our "special" trick-or treaters, our friends who live nearby that either walk or drive over to say hi and show us their costumes. This year, I wanted to make a little special something for our friends. The "regular" trick-or-treaters, just get boring old candy, but I made these goodie bags for our friends :)
I took some old scrapbook inserts, you know those papers that come inside the page protectors? yeah, I never scrap with them, usually they are kind of flimsy, but they can be perfect for a project like this. I always assume stuff like this will likely get thrown out anyway, so I like to make them cute, but not spend loads of time or money on them. I stamped some stamps from a REALLY old Autumn Leaves set. felt good to ink those up! I colored with Copics and added a little Stickles, and there you have a treat bag topper. Or twelve treat bag toppers! 
I had some bat rings and fruit snacks leftover from the bags we made for Ev's Fall Party, I added a couple chocolates to each one, I think they turned out cute, I hope the kids like them! :) Just a simple little goodie, but still fun :) 

Well, that's it for me, I have another fun post for you tomorrow, have a great one! :)

xoxo, Noelle

supply list: stamps: Autumn Leaves, Stickles, Copic markers

DUST IT OFF!: Use those old scrapbook inserts to make some treat bag toppers, and while you're at it, pull out some OLD stamps to use on them! :)

Friday, October 28, 2011

Creature Comforts (JB44)

Hi all! What a week! We've had some sort of meeting or event every night his week, not to mention all the regular sports, homework, etc. And my dear friend was visiting me from CA, and it snowed, it snowed ALOT, actually! :) But with all that's been going on, I never had time to sit down and craft anything! Today, I probably should have been cleaning, doing laundry, etc. But, I just had to sit down and create. My mood was crying out for some creative time :)

These 2 cards are for the Not a creature was stirring challenge at Jingle Belles this week! I had been dying to ink up these new stamps Owl and the penguins which I can no longer find on the site. I punched 2 large circles and stamped my images. I focused the Copic colors for coloring around the DP's I was using. To the penguins, I sketched in an ice floe for them to sit on and coated it in Crystal Effects to make it shiny. The owl got some pearl "ornaments on his pinecone Christmas tree and I added Stickles to both images.
I actually had the dotted panel on this card at a wider width like the one on the owl card. But then once I got all my papers cut, I decided that I wanted the decorative corner with the snowflake to show more than it was with the panel wider, so I cut that one down a bit. It was still wide enough to stamp my sentiment down, so I think it worked out ok. :)

You can see the Stickles closer here but it's a bit harder to see the glaze on the "ice."


I loved this little guy from the moment I saw him. I love that he made himself a little tree out of a pinecone. I wanted to emphasize the "decoration" aspect of the stamp with some ornament printed paper and by adding a few ornaments to his "tree." Oh, and if you don't live in CO, you might not realize that's a blue spruce tree he's perched on... they are exactly that shade of bluish green. ;)

You can see the Stickles and pearls better in this shot.

Well, that's it for me tonight! heading out to a Halloween party at the church in a little while, the kids can't wait! :) Have a stellar weekend! :)

xoxo, Noelle

supply list: stamps: Inkadinkado; patterned papers: Crate Paper and BoBunny; punches: EK Success; markers: Copic; Stickles; inkpads: Memento