


Hi there! Hope you all are well.... my kids are off school and it's been unseasonally warm here.... boo...... :( I like a cool, crisp Fall myself, but I don't think I'm going to see it this year! I thought making a cute Christmas project might make me feel more "seasonal" somehow! :) I am participating in a Christmas tag SWAP with some of the ladies in the scrapbooking group that I recently joined. You make 12 tags and get 12 tags (all different) back in return! I think it will be fun since I always have the best intentions to make my own Christmas tags & never actually do so! So here's my tags, at least a few... I've made 6 so far and have 6 to go. I used different papers on them since I was trying to use up scraps.
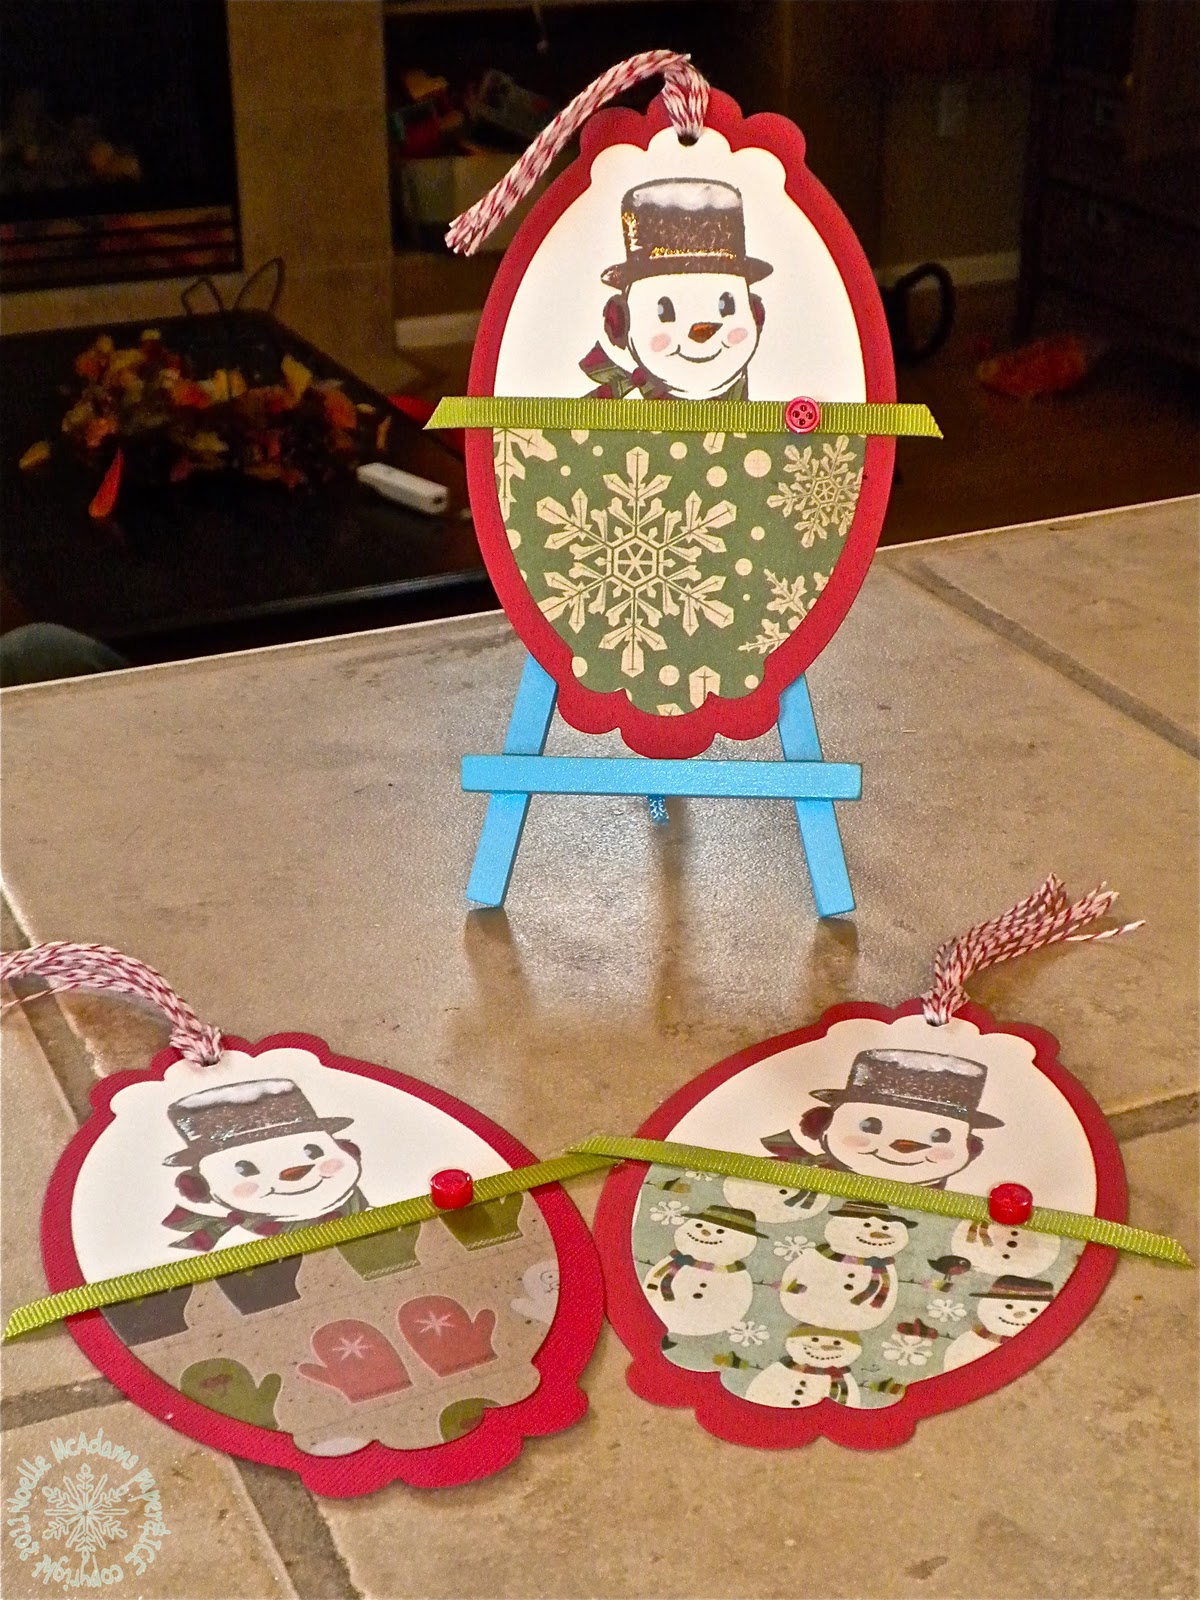
I think they are pretty cute! Opinions? I thought maybe I should have pleated the ribbon, but I have to mail them, so I didn't want them to get too thick. I used my new favorite Snowman stamp from Inkadinkado. You may remember him from this card that was featured on Jingle Belles in April. I loved that card & I did the same thing here with the white flocking powder and Stickles on his hat. The tag base is made from the largest die in this set of Nestabilities. Then I cut 6 ivory pieces with the next smaller die and cut them in half. I stamped my snowman in brown Memento ink and colored him with Copics. Then I added the flock and Stickles.

I cut the patterned papers with the die as well. The ones that were an "all over" pattern, like the snowflakes, I just cut a full piece and cut that piece in half. The ones that were an "up and down" pattern (like the mittens and the snowmen) I only die- cut the half size at a time, so they wouldn't be upside down if that makes sense.

I ran a strip of Olive ribbon across the center to hide the seam where the 2 papers meet. I accented the ribbon with these little adhesive buttons I recently picked up at Archiver's. They were sold by the adhesive gems, if you are looking for some. For the top, I threaded some baker's twine through the hole. To do this, I wrapped the twine around my hand 7-8 times. I gathered the loop, and put one end of the loop through the hole I'd punched. I pulled it through the hole enough that I could widen the hole in the loop. Then I put the top part of my twine bundle through that hole, and pulled. The final step was to trim the ends off so I had a tassel instead of a loop. If you have large spools of baker's twine, like me, this is a great way to give a fun accent for just pennies. I bought this 2300 foot spool of red baker's twine at Crate and Barrel last Christmas for only 8$! The final touch was to stamp my "to: from:" stamp on the back of the tags.

Well, I hope the other ladies in my SWAP like these! I like them enough, that I'm making a couple extra, just for me :) Hope you have a fabulous weekend!
xoxox, Noelle
supply list: solid cardstock in red, ivory, and green ribbon: Stampin' Up!; stamp & flocking powder: Inkadinkado; dies: Spellbinders; markers: Copic; assorted holiday paper scraps; glue pen; baker's twine: Crate and Barrel; brown dye ink: Memento
DUST IT OFF!: Use your scraps to die cut or punch and use on tags! :)
3 comments:
aww these are so stinkin cute... Love how you put flock on the hats... love them..
oh, I have this snowman too! I need to use it! Adorable tag creations!
I adore this tag! The snowman stamp is cute as can be.
www.craftingrebellion.com
Post a Comment