Friday, December 30, 2011

Ev's Valentine (MFTWSC52)

Ok, so clearly, I'm anxious for 2012 to hurry up and GET HERE!! Also, I had so much fun making Ian and Collin's Valentines the other day, that I thought I'd go ahead and make Ev's, too. Cute, huh? OF COURSE, I used the only set I can seem to possibly use when it comes to Ev, MFT's Little Loveosaurus. In fact I made his Valentine last year with the same set and a different MFTWSC sketch! Here's the sketch for this week.


Isn't this cute? I used the same tickets I'd used on the other boys' Valentines for the long strip. I stamped on there the "My Little Loveosaurus" stamp repeatedly down the strip. I colored the image with Copics and paper pieced his costume, this is actually a Christmas paper, but it has some pink in it, and I really liked it for this application as well. :)
The tag the character is on and the tag I punched the heart from are both ANCIENT flocked valentines tags! LOVE using that old stuff up! :) 

Well, I'm going to keep this short and sweet, hope you have a very Happy New Year! Big hugs! 

xoxo, Noelle
 supply list: stamps: MFT; punch:EK Success for SU!; tickets: Tim Holtz; valentines tags: Heidi Grace Designs; DP:MME & Crate Paper

DUST IT OFF!: Use some old tags to punch shapes from. 


Wednesday, December 28, 2011

Young Man Valentines


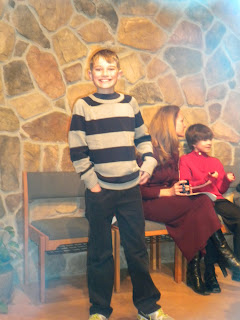
Hi there! I was needing crafty time today, not for a challenge or an order, but just for me. :) Do you ever feel that way? Sometimes I get so wrapped up in challenges, design work, submissions and orders that I feel I need more crafty time? I know, weird, but I just feel I want to play! With whatever I want and whatever colors or layout my little brain can fathom. :) So that's what this was, experimentation, some new product, and some really old stuff too. Do you like? My boys are getting so big! I'm particularly referring to the older 2. Ian is 11 and just got his first CELL PHONE for Christmas. I shouldn't sound so shocked since the whole thing was my idea, but hey, then I have these moments of total disbelief that my first baby is a "tween." He seems so grown up, too. Here's a recent pic:
Isn't he handsome? He's smart, too, and athletic, and kind and well, just about all things that would make a mom proud. I actually bought these "My Guy Ian" stamps from The Greeting Farm with him in mind! Not only because of his name, but because the "older" feel to these stamps seemed to fit. So here's the Valentine I came up with for MY Ian....
I started out with this DP in mind. I used my SU! heart punch, my new PTI banner die and some canvas flowers on these cards (all newer items). Then I used the chipboard hearts & the red suede photo corners (OLD items!) Here's a closeup on "Ian" do you like his jeans? For all the clothing on both these characters, I used Copics and then watercolor pencils over the Copics to give the clothing a "woven" look. You can blend the watercolor pencils with the Copics. I don't think I would try using a blender pen on top of the Copics, I didn't try it since the Copics worked well, but I have a feeling that might cause the cardstock to fuzz or pill if you mixed the water based blender pen with the alcohol ink markers.
After coloring his hair with Copics, I added some extra hair strands with a Stampin' Up! marker in Soft Suede. 

I was really happy with the way the first card turned out, so I decided to make another for Collin. :) Collin is 9, incredibly bright and funny. he's an an avid reader. He lights up any room he's in. He has a way of making everything he tries look easy. Here's a pic of him that I took at his school party: 

Here's the card I made for him:

It's similar to Ian's card, same layout. I made this character with a burgundy sweatshirt and a blue and yellow baseball cap, since Collin wears these items often. I decided to do brown cords on this one instead of jeans for a change of pace. Here's a closeup on this little guy: 

Well, I hope you like my cards, I had fun making them :) It may be a wee bit early to start on Valentines, but I don't mind telling you, I am HUGELY excited for 2012 to hurry up and get here! 2011 has been a YEAR (and not a good one) around here. Multiple broken bones, a car accident, multiple serious surgeries for my family members, and much much more. And while I'm sure that 2012 won't be trouble-free, I am hoping it won't be the bad-news-every-week kinda year that we've just been through! 

I hope YOU have a very Happy New Year! Big hugs!
Noelle

supply list: stamps: the greeting Farm and TCP sentiment; DP: My Mind's Eye and K&Company for banners; die: Papertrey Ink; canvas printed flowers: BasicGrey; buttons: Crate Paper; tickets: Tim Holtz; heart punches: EK Success for Stampin' Up!; red chipboard hearts: Heidi Swapp; red suede photo corners: making memories; markers: Copic and SU!; watercolor pencils

DUST IT OFF!: Those chipboard hearts and red corners are SOOOOO old! Felt great to use them up! Perfect color, too :) 

Tuesday, December 27, 2011

CQC #117 Soccer Scrapbook layout!

Hi all! We are having a fun, EASY challenge over at colourQ this week! Just in case you are having a hangover from too much sugar, noise, busyness; like yours truly, this will help you wet your feet back into crafting! Here's the palette:

Here's my pages, I still had a few pics that needed scrapping from when Ian played soccer. Black and white just screamed "soccer ball" at me. ;)
So, the other color of my choice was obviously GREEN! All that grass in the pics, what other way could I possibly go? I started out by cutting out the large soccer balls from a piece of soccer DP I had. I put those in the outer two lower corners of the layout. I matted my photos in black and arranged. For the title, I used some dotted DSP (old SU! Night and Day pack from a few years back). I cut the title letters on my Cricut and stamped them with a black soccer ball stamp. I accessorized with a few coordinating stickers, and a plain journaling block.

This "xtra pix pocket" is a bit of a departure from normal, but something I have done before... This was the last of Ian's soccer pics, so I wanted to include all the pics, not just the ones I had room to scrap. I cut a slit (actually more of a very skinny rectangle) into the paper. On the back side of the page, below the hole I'd cut, I created a pocket with scrap paper from the layout and foam tape. On the front of the page I added the "xtra pix pocket" label and a few stickers to hide the edges. Here's some photos, so you can see.
Front of pocket

back of page, this is adhered with
foam tape so the pocket is deep enough
to hold all the pictures.
Well, that is it for me today! Trying to get the tree down and the house cleaned up! Oy, is it ever a MESS! Be back soon! :)

big hugs, Noelle :)

supply list: DP: Stampin' Up! and Creative Imaginations; stamp: Stampin' Up!; Cricut for title; assorted stickers; green star stickpins: Little Yellow Bicycle; Dymo labelmaker with black tape

DUST IT OFF!: It's ALL old for this one! :) Enjoy!

Monday, December 26, 2011

Coffee Tumbler makeover (TCPTUES190)


Hi there! I just wanted to show you this fun little project I made for a second run at this week's TCP Tuesday 190.


I picked up this coffee tumbler at 50% at Starbucks. Gotta LOVE that holiday clearance! The cool thing about this, is that the inside and outside parts of the tumbler unscrew from each other and the clear acetate insert (with the snowman)comes out.... So my little crafty brain starts thinking, if that insert comes out, then I could make another insert to go IN, right? In fact, I could make several of these to go in here, and just change them out for different seasons, wouldn't that be fun? But, for now, I'm just making this one! ;) Since I can take it out when it comes time to wash the cup, it can be used over and over! :)


CUP WITH ORIGINAL INSERT

Here's the sketch for TCPTUES, love this!!

SKETCH
And here's the insert outside the cup, so you can see that I followed the sketch.


And here's some more shots of the cup put together:


and... it goes without saying probably that every paper on this project was a SCRAP! Oh yes! You know how I love diggin' around in that scraps bin! ;) 

Well that is all for me today! I'll be back soon with a new colourQ challenge! :)

xoxo, Noelle

supply list: stamps and dies: The Cat's Pajamas; papers: Scraps; markers: Copic & Zig; oval cutter: Creative Memories; white craft ink and white embossing powder

DUST IT OFF!: No new papers were cut in the making of this project. :)


BLOG CANDY WINNER!!!


Hi There!! Hope you had a very Merry Christmas or are having a happy Hanukkah or Kwanzaa. I used a random number generator to pick a number between 1 and 11, and it picked number SEVEN, which is Peg!!


Peg said:

"Hi Noelle thanks for the chance to win. I follow you on my Google Reader feed and love to see how you use up older products because heaven knows I have lots! My favorite Christmas gift...hmmm, there are a few but I would say the pinecone wreath that my parents made me the last Christmas we had my mom with me is the current leader. Have a fun holiday! I don't have a blog so I can't help on the traffic stuff but appreciate the chance to win!"
Peg, please email me your mailing addy to mcadams01@msn.com, and I will mail your package tomorrow if I have your info by then! Thanks to all who participated! :) I will be back soon with a fun crafty way to spice up your cold coffee tumbler ASAP! 

big hugs! Noelle

Sunday, December 25, 2011

YOU'RE THE BEST! Merry Christmas! :)


Merry Christmas to all my wonderful blog friends! Today is my birthday, too. :) When looking back over my last year of life; I have to say that I count this blog and all the wonderful friends I've met doing this among my blessings! YOU'RE THE BEST, just like this card says. Thank you so very much for all your friendship, inspiration, support, and comments. 

I needed to send a little note out last week, and I like the way this CAS card turned out so much, that I think these will be my Christmas thank you notes, using (you guessed it!) a variety of scraps and old product! ;) I had been coveting both these dies from PTI, and I am SOOOO glad I got myself a little birthday present! I'll show you when they are done. 

And remember, I am drawing the winner for my Christmas blog candy TOMORROW, if you're already a follower, you just have to go to the BLOG CANDY post (link is on the sidebar) & comment. If you want to join in and you're not a follower, just become a follower and then comment at that post. So far there's only a few (less than a dozen), so comment to win! I'd love to send YOU a little late Christmas gift. 

Merry Christmas to all, and to all a GOOD NIGHT! 

Much Love, Noelle

supply list: DP: Stampin' Up!; dies: PTI; stamp: Verve; patterned tape: Martha Stewart Crafts; pink pearls; black inkpad

Thursday, December 22, 2011

Final Christmas card for 2011 (TCPTUES190)


Hi there! We had a BIG snowstorm here in CO last night! Almost a foot and still falling! I have a fondness for days like this when we are forced to stay home and do fun Christmasey things :) We plan on a Sour Cream Twist making, sugar cookie decorating, holiday movie watching, hot cocoa drinking, kinda day :) 


Plus I was feelin' "cardy" so I managed to get ONE more Christmas card made before it's
**TOO LATE** gasp! (insert Macauley Culkin "Home Alone" face here) ;) 

This is for this week's TCP Tuesday 190 sketch challenge!! Here's the super-fab sketch, I LOVE this, must save for a day i have more time to do more cards with it! Would be awesome vertical as well :) I omitted the oval, but added another rectangle with the sentiment.  
I used some SU! DSP from last year, I have a ton of it left, and using different papers from the same pack really makes it a snap to coordinate! I used good ol' A Beary Good Year to make this fun card. Gotta love PJ! I paper pieced his belly and face. I colored the rest of him, the Santa hat, and the candy cane with Copics and fussy cut it all out. I added some Frosted Lace Stickles to the hat. A final touch was to add a snowflake cut from the new Snowflake Lace Paper die and an adhesive button. 

Well that is all for me today, have a holly jolly Christmas (or a very happy Hanukkah or a joyous Kwanzaa) and I will be back for a brief post on Sunday night. :) And don't forget, my birthday is on Christmas and I'd love to send YOU a birthday present with my blog candy giveaway! Click on the linky on the sidebar there to comment to win. :)

holiday hugs to you! Noelle

supply list: stamps and die: TCP; papers, cardstock, ink: Stampin' Up!; glitter button: Recollections; bakers twine: Crate and Barrel; Stickles; adhesive button: Pebbles

Tuesday, December 20, 2011

Christmas Eve Scrapbook page (CQC116)


Hi there! Time for another fun Christmasey color combo at colourQ!!!

Here's the palette! Love the kraft, don't you?

cqc116
I knew I definitely wanted to use this pic from Christmas Eve last year. I found this paper in my stash, it is kraft with red foil flowers on it. The flowers reminded me of poinsettias. For the border around the page, I used my new Martha Stewart Crafts Ribbon Loops Punch Around the Page set that I won in my last Spotted Canary prize package! And, don't forget, I am offering the Double Loops Punch Around the Page set as part of my BLOG CANDY GIVEAWAY! There's only a few more days to enter, so I hope you will go comment!! If you link up to those punches, you can see the set that's being given away retails for over 27$.


Ok back to the page! I used one of my vintage look Santa tags )I showed you another style of those tags here.) The Santa tag coordinated well with the border sticker I used on the kraft banner at the top, the sticker shows Santa unfurling a paper that says "Dec. 24" PERFECT for this page! For my journaling block I die cut a kraft lined journaling cardstock and a green mat. I dressed the ornament up with a silver foil top and a holly sticker from my stash. The title was made with green stickers (a perfect match for the Lucky Limeade color!)

Well, I hope you like my page! Please give yourself a little break from shopping, wrapping, and baking to have some "craft therapy" by playing with us at colourQ!! :)

have a merry day!

xoxo, Noelle

supply list: punches: Martha Stewart Crafts and EK Success; paper and border sticker: K&Company; journaling cardstock: Creative Memories; tiny tag and solid cardstock: SU!; Santa tag: Cavallini and company; sticker letters: October Afternoon; dies: Spellbinders; number stamps: making memories; 3D sticker used on ornament: K& Company

DUST IT OFF!: that tiny tag, mini letter stamps, border sticker, and even that cool paper are older. the tag and stamps are several years old!


Monday, December 19, 2011

Bits and Pieces


"It's the most iiinsane time of the year..." Sing with me now! ;) hahaha! 

I am doing really well, actually. I'm feeling a lot more "together" this year than I often do at this time of year. I think the fact that my kids got off school a few days earlier than normal really helped me to be proactive about getting my shopping DONE (yes, it's done!) and even the wrapping, baking, cards; while not totally done, are far more done than usual at this time of year. So it's all good.

There's been a LOT of this going on, handmade goodies, gift packaging etc. These aren't the greatest pics, but I wanted to show you some things I did and ways I simplified and saved some money this year. :) 
Ok, first up GOODIE BOXES! These are for those friends and neighbors with whom we exchange goodies. the original plan was to make boxes from cardstock. Of course, these handmade boxes were going to be hand stamped, with fabulous big bows on top and some kids of glitter involved..... 

Ok, FAST FORWARD to reality!! LOL, I found these Ziploc containers in a holiday green color at the grocery store. Easy and fast to decorate the tops with patterned paper scraps, some old holiday stickers and premade tags. Of course I had to throw a little bakers twine in there, too ;) 


I was still needing a few more little gifties and didn't want to spend a lot, so here's what I did... I found a recipe for peppermint bark. It's super easy and only uses different kinds of chocolate chips and sprinkles. So I made little jar mixes so folks can make their own once all the holiday sweets are gone. I added these cute spatulas that I found at Hobby Lobby last week for 2$! 

My **EXTREMELY TALENTED*** (yes, he made me write that) ;) hubby made these great tags on the computer with the holiday motif and the recipe. Check it. 

I made 4 of these, but forgot to snap a pic before I gave one away... Decorated the jar lids with some scraps of holiday DP and a variety of snowflakes. I also added premade tags to the recipe. 


So these were QUICK, EASY holiday gifts that used up scraps, stickers and tags; just a plethora of the way-too-much Christmas stuff I've got laying around here. Perhaps it will inspire you to do the same? Hope you are having a very merry holiday season!

And remember, I am drawing the winner for my Christmas blog candy on the 26th, if you're already a follower, you just have to go to the blog candy post (there's a link at the top of the sidebar there...) and comment. If you want to join in and you're not a follower, just become a follower and then go to that post and comment. so far there's only a few, so comment to win! I'd love to send YOU a little Christmas gift. :)

big hugs, Noelle 

DUST IT OFF: Before you reach for that new pack of stickers or uncut papers to decorate your holiday treats, stop and look around! Try and find some things you would like to have used up and out of your hair! :) 

Friday, December 16, 2011

Snowbunnies (TCPTUES189)

Hello there! My boys were totally driving me up one wall and down another this afternoon! Funny it was only the first day off of school, too. I fully admit to popping them in front of a movie and making this card ;). Not that it stopped their fighting, but at least gave me a mini-escape from it! SOOOO glad hubby is taking vacay time while they are off. We ALL need a break!

so the TCP Tuesday challenge is to use TCP christmas stamps AND the bracket die (the one I used on the bottom!) if you have it. I am insanely IN LOVE with this Freezin' Season stamp set and decided to isolate the snowbunny part of the image. I stamped three and fussy cut them out (I cut off their spindly arms and drew them back in on the card because, whilst some of you have some MAD SKILLS when it comes to fussy cutting, I do OK, but not THAT great!) ;) besides, I wanted to make them hold hands! :) I paper pieced their scarves adding polka dots to the center bunny's scarf with my Copics. I also added (tough to see here) some Frosted Lace Stickles to the tops of their ears.


The background was done with some spray ink (the color is fittingly called Jack Frost!) and I used a die cut made from this Snowflake Lace Paper CutUp die. which I used as a mask. I also did that on this card.

Not much else to tell, I guess. Guess I should rejoin the household (now that the kids are IN BED!!) ;)

have a stellar evening! Don't forget about my blog candy there on the sidebar!

xoxo, Noelle

supply list: stamps and dies: TCP; DP: Authentique and MME; Copics; spray ink; white pigment ink and white EP


Cookie Exchange!


Hi there!! I just wanted to share this little project with you. This is the time of year when we are all scrambling around trying to get all those last minute gifts for neighbors, teachers and friends done. I am having a cookie exchange with my family soon. I am so tickled with the way this project turned out. Especially since the ONLY thing I bought to make these was the cookie ingredients! The recipe I used is at the bottom, if you want to check that out. But these egg containers would also work well for cake balls, mini cupcakes or muffins, mini cookies, etc. :) 


I used only scraps and old stickers, tags, etc. on this project. I decorated the outside of 4 old egg cartons that I'd saved. It FELT SO GOOD to use up so many old things that were just sitting there, taking up room! I printed the recipe out on Kraft cardstock and border punched the right side, added a few more stickers and it was done. The only real tip I have if you want to try this is to use a REALLY good, super-sticky adhesive because the egg cartons are hard to stick to. 

Some more pics...


And here's a pic of the inside, if you want to use my recipe, I highly recommend using the little cupcake liners to keep them from sticking to the carton. :) Thanks for popping by!! Recipe is at the bottom. 

hugs and general merriment! -Noelle


Peppermint Oreo Cookie Balls (no bake recipe!)

1 package (15.5 oz.) Oreo Cookies
1 package reduced-fat cream cheese
1 can store bought chocolate frosting
¾ tsp. peppermint extract
sprinkles

Crush Oreos either in food processor or with rolling pin.
Mix in peppermint extract. Mix in cream cheese a bit at a time.
Roll mixture into balls. Microwave frosting for 30-45 seconds until runny.
Dip each cookie ball in frosting and set on wax paper lined cookie sheet.
Add sprinkles before cooled.
Once all cookie balls are ready put in freezer to harden.

**With a food processor: crush cookies in processor.
Add extract and pulse. Add cream cheese a bit at
a time and keep pulsing machine until mixture is complete.

Thursday, December 15, 2011

Christmas ornaments/tags


Hey all! Happy Thursday! First off I'd like to apologize for being so tardy and flaky with returning comments lately... Has just been one of those weeks where I go go go go alllll day long & fall into bed exhausted in the evenings. I haven't been keeping up with my blogroll or commenting very well, so please forgive me! :( The boys are about to be off for 2 weeks of holiday merrimient, so I'll do my best, but am not making lots of promises right now. Should be back to normal again by the New Year, you know how it goes! :)

After I finished my colourQ project the other day I went a little crazy die cutting ornaments from Christmas scraps! I figured these could be gift tags, or ornaments, or both! And the great news is that I used nothing but scraps/old supplies and made ALL of these in about 20 minutes! More pics...


Love to make something useful out of leftovers :)

Have a great one!

hugs, Noelle